Create Sourdough Starter in 7 Days – Beginner Guide
Create sourdough starter from scratch in just seven days — it’s easier than you think. Before you can even think about preheating the oven, you’ll need one thing first: a healthy sourdough starter. With only flour, water, and time, you can grow your own bubbly culture that will become the base for every loaf you bake.
A starter might sound mysterious, but it’s really just flour, water, and time. Over a few days, wild yeast and friendly bacteria move in, and that bubbly mixture becomes the natural leavening for all your future loaves.
This guide walks you through exactly how I create a starter from scratch — step by step, in just seven days.
🎥 Prefer to watch instead of read? Check out my full YouTube tutorial at the bottom of the page.
What is a Sourdough Starter?
A sourdough starter is a living culture of wild yeast and lactic acid bacteria. Instead of using commercial yeast, bakers use starter to naturally ferment and rise bread — which gives sourdough its signature flavor, texture, and aroma.
The best part? You don’t need anything fancy. Just flour, water, and patience.
What You’ll Need
✔ Flour – I use all-purpose for simplicity, but mixing in 10% whole wheat or rye helps kickstart fermentation. Avoid bleached flour if you can — it won’t be as lively.
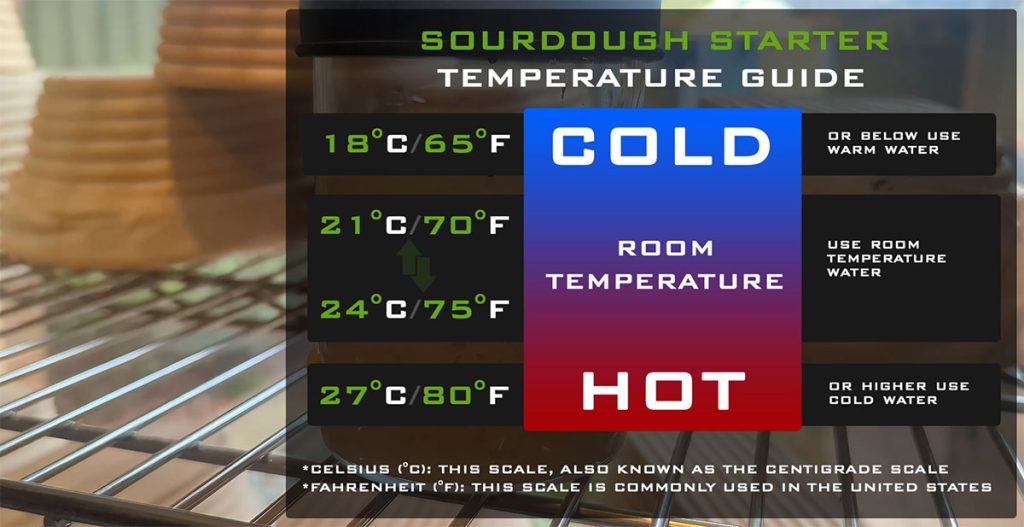
✔ Water – Use warm water if your kitchen is cold (under 18 °C / 65 °F) and cool water if it’s hot (over 27 °C / 80 °F).
✔ Jar – A clear jar helps you see activity. I love my Sour House jar because it’s smooth and easy to clean. (Loose-fitting lid is key — airtight lids can cause trouble!)
✔ Spatula – Great for mixing and scraping the sides clean.
✔ Scale – Optional but strongly recommended for accuracy (we’re working in grams here).
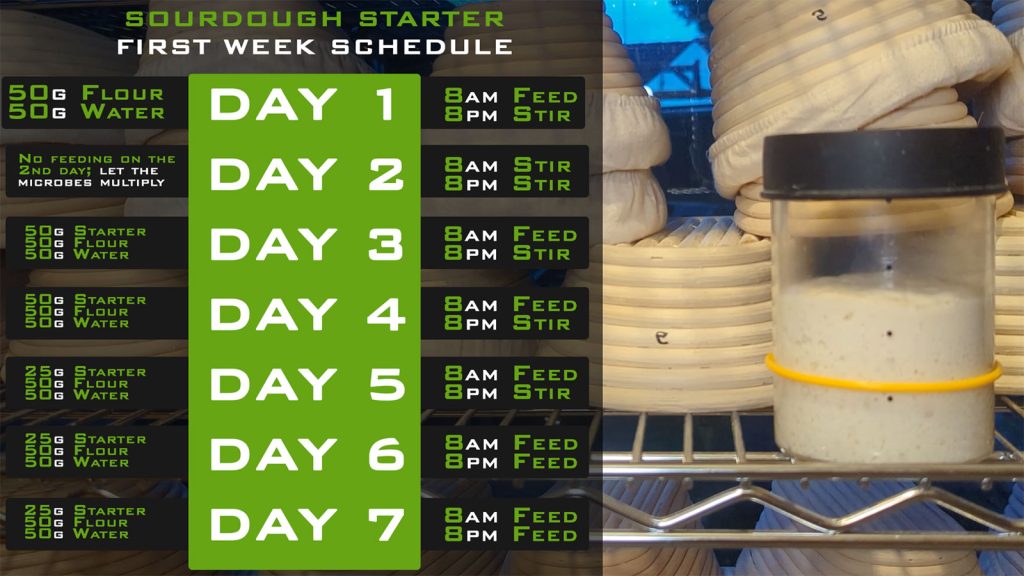
The 7-Day Sourdough Starter Method
Day 1 – Mix Your Starter
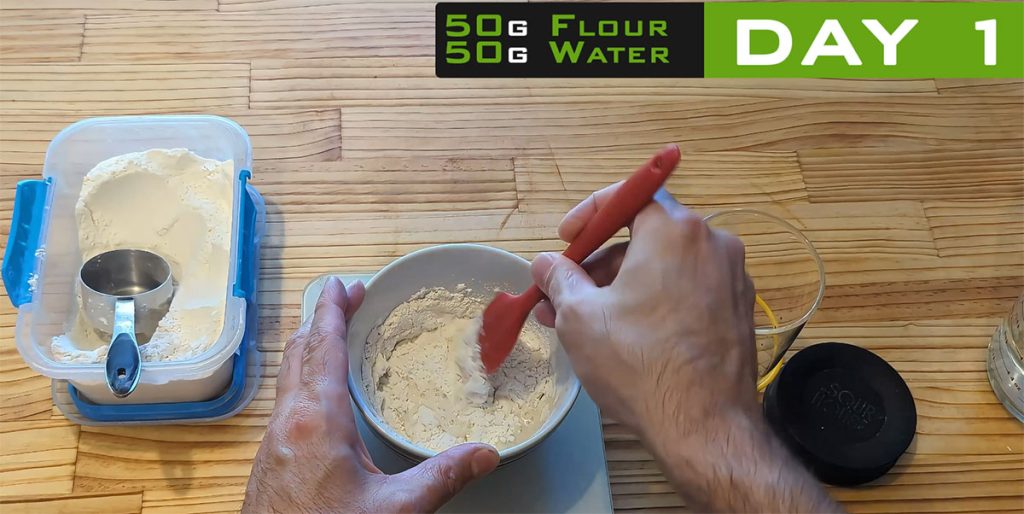
- Add 50 g flour + 50 g water to your jar.
- Stir well, making sure everything’s fully combined.
- Loosely cover and leave at room temperature for 24 hours.
📌 Tip: I stir my mixture in a bowl first, then transfer it to the jar to keep the jar sides clean.
Day 2 – Stir, Don’t Feed
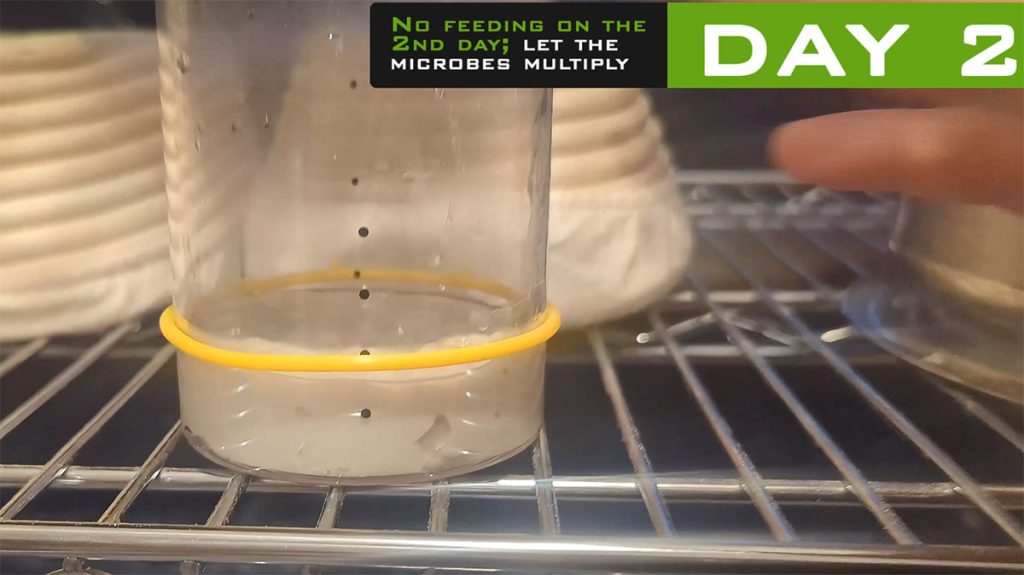
- You probably won’t see much activity yet. That’s normal!
- Stir the mixture once or twice to keep everything blended, but don’t feed it yet.
Day 3 – First Feeding
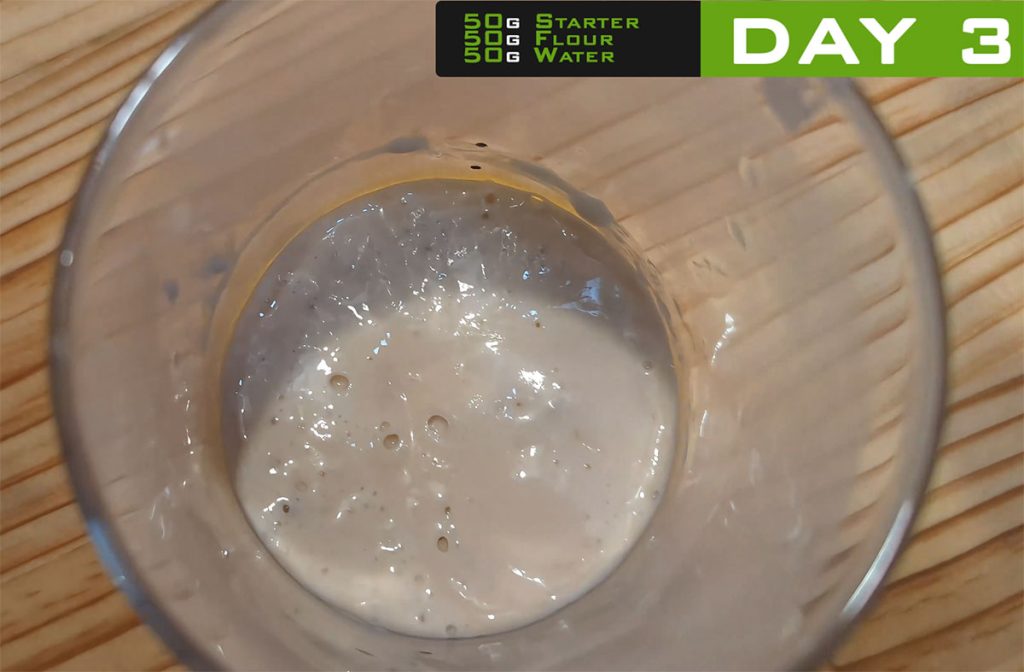
- Take 50 g of the starter and mix it with 50 g flour + 50 g water.
- Discard the rest (this keeps the mix balanced and prevents waste from building up).
- You might see the first signs of life — little bubbles are a good sign.
📌 What is “Discard” and Why Do We Do It?
When you feed your sourdough starter, you’ll always remove (discard) some of it first. This might feel wasteful, but there’s a good reason for it:
- Keeps the starter manageable – Without discarding, your jar would double in size every day, and you’d need bags of flour just to feed it.
- Maintains balance – Removing some starter before feeding keeps the yeast and bacteria at healthy levels.
- Reduces acidity – Old starter sitting too long can make the mix overly sour or sluggish.
👉 You can toss discard in the bin, compost it, or save it for “discard recipes” like pancakes or crackers once your starter is mature.
📌 Stirring Notes
After each feeding, I like to give my starter a quick stir about 12 hours later.
This isn’t a full feeding — just a light mix to:
- Redistribute flour, water, and any bubbles
- Keep yeast and bacteria active
- Stop a dry crust forming on top
👉 You don’t have to stir at 12 hours, but it keeps the starter fresher and more even as it develops.
Day 4 – Bubbles & Growth
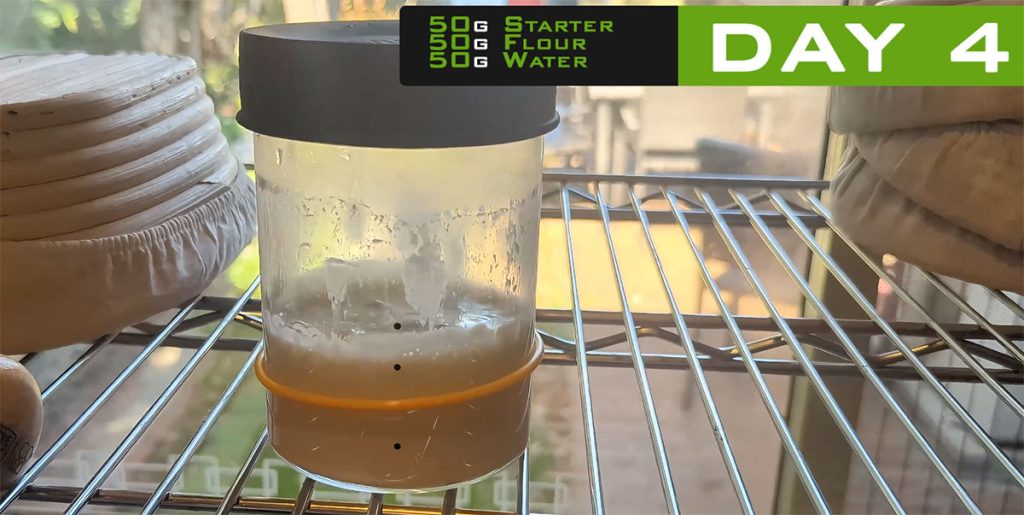
- Feed again: 50 g starter + 50 g flour + 50 g water.
- Around now, your starter might rise by 50–70%. That’s exactly what we want.
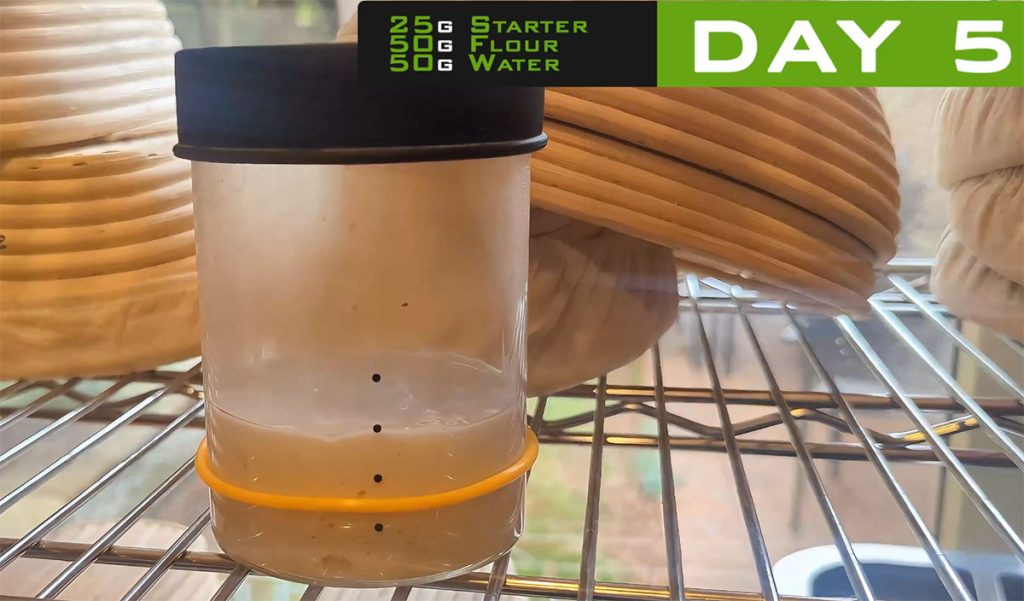
Day 5 – Adjusting the Feed
- Your starter may have doubled and started to sink. Perfect.
- Time to slow things down:
- Mix 25 g starter + 50 g flour + 50 g water.
- This helps balance yeast activity and keeps acidity in check.
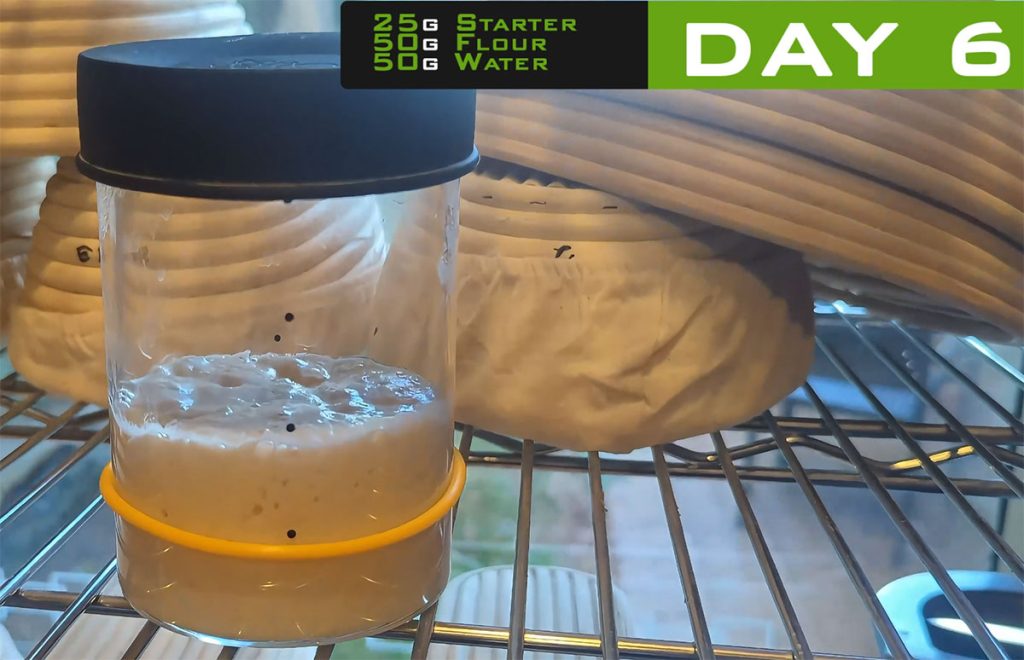
Day 6 – Super Active
- The starter’s likely rising fast — maybe peaking and falling quickly.
- Shift to a lighter feed: 10 g starter + 50 g flour + 50 g water.
- This lets it ferment over a full 24 hours without getting too sour.
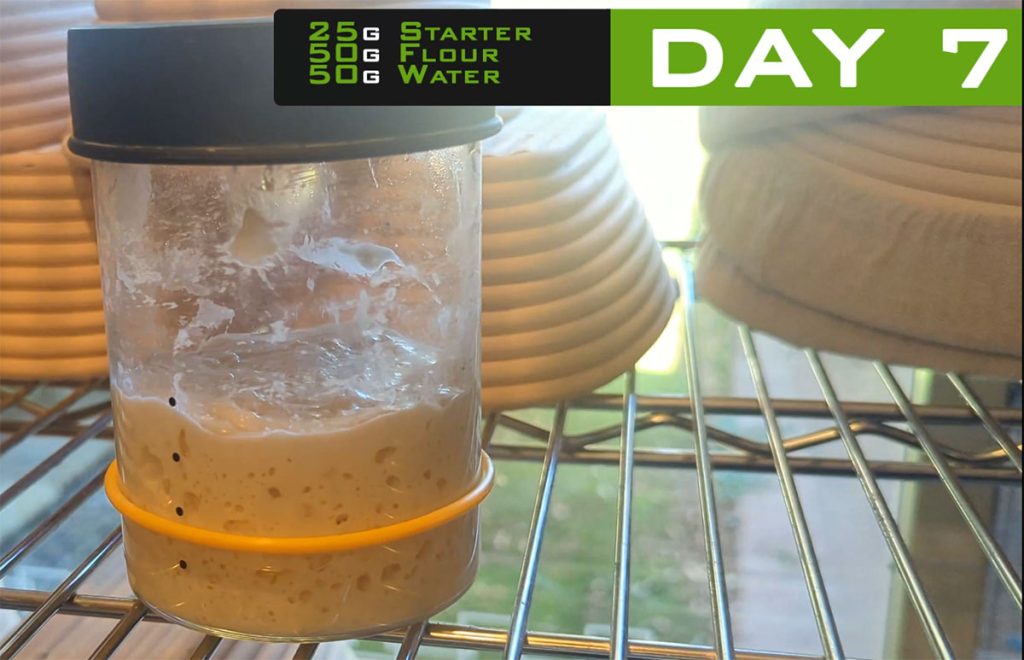
Day 7 – Ready to Bake
- By now, your starter should double easily and smell pleasantly tangy (like yogurt, not harsh vinegar).
- If it’s this active, it’s ready to bake with. 🎉
👉 Not there yet? Don’t stress. Just keep the Day 6 feed ratio for a few extra days until it’s strong.
Maintaining Your Starter
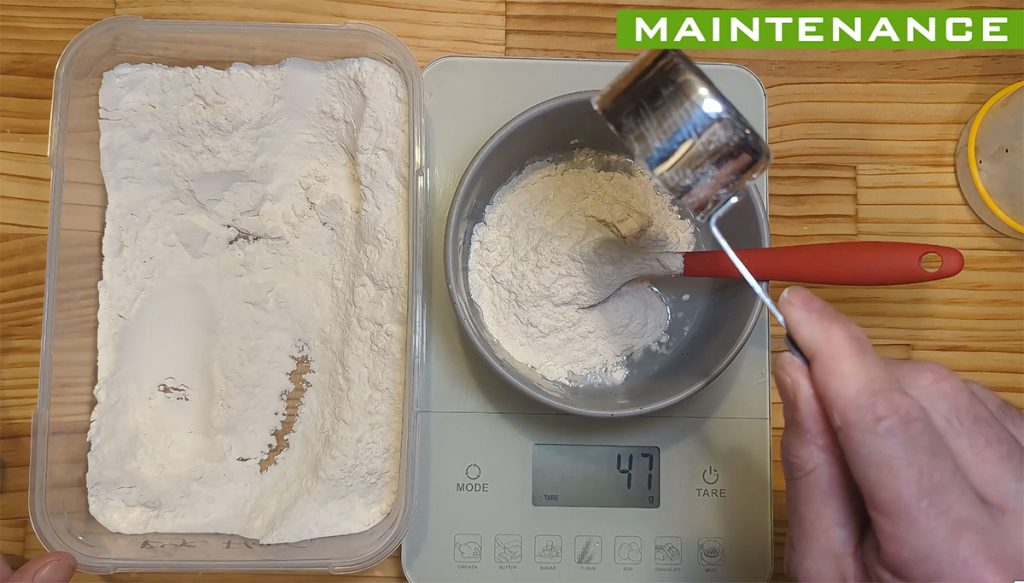
Now that you have a bubbly, healthy starter, you can keep it alive for years with regular feedings.
- Daily use: Keep it on the counter, feed once a day.
- Occasional use: Store in the fridge and feed weekly.
(I’ll have a full written post on starter care soon — but in the meantime, there are already multiple videos on my YouTube channel about how to maintain your starter. And yes, a dedicated starter maintenance video is coming very soon — stay tuned!)
Troubleshooting Tips
- No bubbles yet? Be patient — some kitchens take longer.
- Starter smells too acidic? Feed less starter to more flour and water (like we did on Day 5–6).
- Mold? Toss and start again. (Rare if you use clean tools and flour.)
Watch the Full Tutorial
This written guide is great for quick reference, but if you’d like to see the process step by step (and exactly how each day should look), here’s the full video:

